How to Safely Upgrade Your Ubuntu Server Without Downtime
Keeping your Ubuntu servers patched and up-to-date is crucial for both security and reliability. But for production or client infrastructure, planned upgrades must be seamless: no unexpected downtime, no data loss. This guide walks you, step by step, through the safest upgrade methods for both routine and major version jumps, based on my real experience running business-critical systems.
Read, plan, and execute—your users (and uptime dashboards) will thank you!
Table of Contents
- Assess and Plan Safely
- Take Smart Backups
- Put the Server in Maintenance Mode
- Apply Package and OS Upgrades
- Verify, Test, and Roll Forward
- How to Roll Back (If Needed)
- Pro Tips and Automation
- Summary & Next Steps
1. Assess and Plan Safely
-
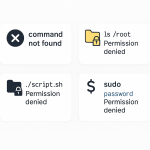
Check Your Current Ubuntu Version:
lsb_release -a
or
cat /etc/os-release
Tip: Make sure you’re not skipping unsupported versions (e.g., 18.04 straight to 22.04 without passing 20.04).
- Review Compatibility: Read Ubuntu release notes and check compatibility of all mission-critical apps, daemons, and custom modules.
- Schedule a Maintenance Window: Notify users of potential disruption. For public websites or SaaS, use off-peak hours and announce on your status page or via email.
-
Document Everything Running: Make a list:
ss -tulpn
and
systemctl list-units --type=service --state=running
Identify what MUST stay online vs. what can handle momentary interruption.
-
Disable Unattended Upgrades: They can interfere with your planned process.
sudo systemctl stop unattended-upgrades
2. Take Smart Backups
- Snapshot the VM or Instance: In cloud/hypervisor, use native snapshot/backup features before any upgrade.
-
Manual Backup Scripts:
- Configs and system state:
sudo tar czvf /root/etc-backup-$(date +%F).tar.gz /etc
- Web/data directories:
sudo tar czvf /root/var-www-backup.tar.gz /var/www
- Configs and system state:
- Database exports (MySQL):
mysqldump --all-databases -u root -p > /root/full-db-backup.sql
3. Put the Server in Maintenance Mode
-
Web Production:
Activate “Maintenance Mode” plugins (WordPress) or place amaintenance.htmlfile as default in your web root. For Nginx/Apache, use temporary redirects. -
Halt Background Processes:
Temporarily stop batch jobs/crons:crontab -e
Comment out scheduled tasks or pause with
sudo systemctl stop cron
-
Message Your Team:
Notify in Slack/Teams/email when maintenance starts and ends! (Auditing and communication = professional IT)
4. Apply Package and OS Upgrades
-
Update All Packages:
sudo apt update && sudo apt upgrade -y
-
Install Kernel/Security Updates:
sudo apt dist-upgrade -y
Tip: dist-upgrade handles dependency changes (kernel, systemd, etc.).
-
Major Version Upgrade (to next Ubuntu LTS):
sudo do-release-upgrade
Note: Carefully read each prompt! Hold “q” to skip changelogs, but never accept file overwrites blind—keep custom configs!
-
Don’t Panic at Service Restarts:
Most upgrade downtime is a matter of seconds as services restart. Monitor your critical logs:sudo tail -f /var/log/syslog
5. Verify, Test, and Roll Forward
-
Check Active Services:
systemctl status nginx apache2 mysql ...
(Check each core service.)
-
Inspect Logs for Errors:
sudo journalctl -xe
and
sudo tail -100 /var/log/nginx/error.log
or replace with your stack’s critical logs.
-
App Test:
– Access your web frontends, APIs, and endpoints.
– Run post-upgrade test scripts (write a checklist: did you break anything…). -
Reboot If Prompted:
sudo reboot
Log in immediately after to verify proper startup and run your checks again.
-
Monitor for at least 30 minutes:
Use uptime monitoring services so you know if a problem cascades after users return.
6. How to Roll Back (If Needed)
- Cloud/VM Snapshots: Restore the instance to pre-upgrade state. Most cloud providers do this in 5–10min.
-
Manual Recovery:
- Restore configs and websites from tar backups:
sudo tar xzvf /root/etc-backup-YYYY-MM-DD.tar.gz -C /
- Restore databases from .sql file:
mysql -u root -p < /root/full-db-backup.sql
7. Pro Tips and Automation
- Use test/dev servers to trial upgrades before touching production.
- For clusters, upgrade one node at a time, move workloads before bad nodes go down, and always keep backup configs per-host.
- Automate some pre/post-upgrade tests with a simple Bash script:
#!/bin/bash for svc in nginx mysql redis; do systemctl is-active $svc >/dev/null && echo "$svc OK" || echo "$svc FAIL" done - Make a habit of updating documentation (config locations, app requirements) each upgrade cycle.
8. Summary & Next Steps
Upgrading Ubuntu servers doesn’t have to be risky—with smart prep, robust tested backups, stepwise upgrades, and a watchful eye, you can handle even major jumps without disrupting users or business impact.
Need help planning your next upgrade, want a tested script, or hit an odd error? Use my contact page—I’ll help you decode it!
Written by Anmol Ahuja, infraDecoded
Find more server reliability and Linux ops guides at infraDecoded.com!